Introduction
In the vast realm of home improvement and construction, the unassuming carriage bolt often goes overlooked despite its indispensable role in numerous applications. Comprising a cylindrical head with a square shank, the carriage bolt serves as a sturdy anchor by being inserted into a pre-drilled hole and secured with a corresponding nut. This unique design endows carriage bolts with the ability to create tight and vibration-resistant joints, making them particularly well-suited for outdoor construction projects and heavy-duty machinery. In this guide, we will delve into the intricacies of carriage bolts, providing a comprehensive understanding of their applications, proper installation techniques, and best practices for achieving optimal performance.

Image: www.youtube.com
A Journey Through Time: The Historical Significance of Carriage Bolts
Carriage bolts can trace their origins back to the early 19th century, during the golden age of horse-drawn carriages. These vehicles required robust fasteners that could withstand the strenuous forces and vibrations encountered on rough roads. Thus, blacksmiths developed the carriage bolt, ingeniously crafting it with a square shank that prevented spinning as the nut was tightened. The carriage bolt’s exceptional reliability and durability quickly earned it widespread acceptance beyond its initial用途for securing carriage wheels, leading to its adoption in a multitude of other industries.
Understanding the Anatomy and Applications of Carriage Bolts
Contemporary carriage bolts are typically fashioned from steel, offering a combination of strength and resistance to corrosion. They are dimensionally standardized by the American National Standards Institute (ANSI) and the International Organization for Standardization (ISO), ensuring compatibility with corresponding nuts and compatible tools. Carriage bolts are available in various diameters, lengths, and head shapes, allowing them to be tailored to specific applications.
The hallmark feature of carriage bolts is their pronounced cylindrical head, designed to bear weight and prevent the bolt from pulling through the material it is securing. The unthreaded portion of the shank, immediately below the head, fits snugly into the square hole, preventing rotation during installation. This ingenious design enables carriage bolts to be used in conjunction with oversized washers, distributing the load and preventing damage to the material being fastened.
Carriage bolts excel in applications where vibration is a concern, such as securing heavy machinery, outdoor structures, and furniture. Their anti-rotation capabilities render them invaluable for connections where slight gaps may occur due to thermal expansion or material settling. Furthermore, their strength and durability make carriage bolts ideal for anchoring into wood, metal, concrete, and masonry.
Installing Carriage Bolts with Confidence: A Step-by-Step Guide
Installing carriage bolts effectively requires careful preparation and execution. It is essential to select the correct size and length of bolt for the intended application, ensuring that the threaded portion extends sufficiently beyond the nut. Moreover, the hole size must be precisely aligned with the bolt’s diameter, preventing any play that could compromise the joint’s integrity.
-
Pre-drilling the Hole: Utilize a drill bit that matches the diameter of the bolt’s shank (unthreaded portion) to create the initial hole. The depth of the hole should be equal to the length of the unthreaded shank plus the thickness of the material being fastened plus an additional 1/4 inch to accommodate the washer and nut.
-
Creating the Square Recess: Using a square-shaped chisel or punch, carve a square recess in the bottom of the predrilled hole, ensuring that it is deep enough to accommodate the head of the bolt. The width of the recess should match the size of the bolt’s head.
-
Inserting the Bolt: Position the carriage bolt in the square recess and tap it gently into place using a hammer or mallet. Ensure that the bolt is seated firmly in the recess, preventing any movement or rotation.
-
Installing the Washer and Nut: Place a suitably sized washer over the threaded portion of the bolt and tighten the nut securely using a wrench or socket. Avoid overtightening, as this could damage the bolt or the material being fastened.
-
Final Touches: For additional security and a finished appearance, consider adding a second washer between the nut and the material being fastened, then tighten the nut to the desired torque.
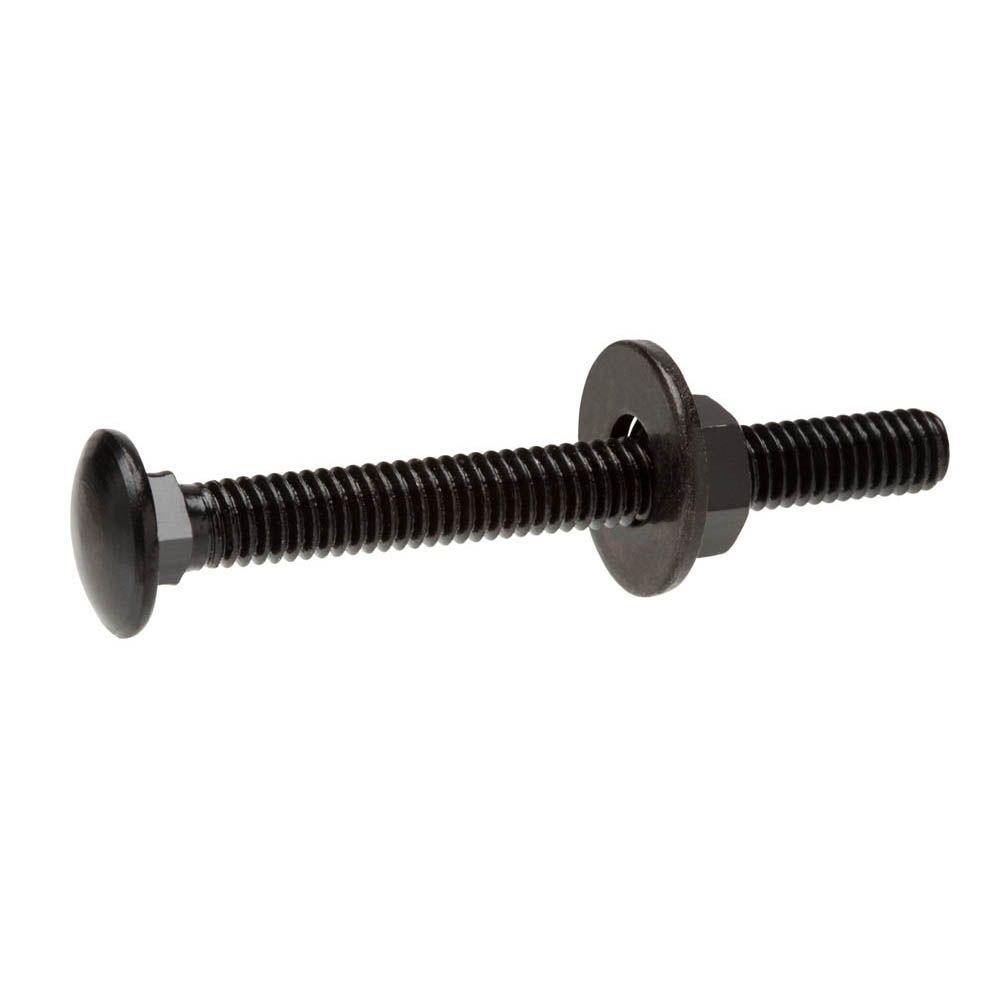
Image: www.homedepot.com
How To Use Carriage Bolts
Ensuring Optimal Performance: Beyond Installation Techniques
Proper installation is paramount for maximizing the performance and durability of carriage bolts. However, additional considerations can further enhance the effectiveness of these exceptional fasteners.
-
Lubrication: Applying a light coat of lubricant to the threads of the bolt and nut can reduce friction and facilitate easier tightening. It also helps prevent corrosion and seizing, ensuring long-term functionality.
-
Washer Selection: Select washers that are large enough to distribute the load adequately. Carriage bolts require square washers with a hole size that matches the bolt’s diameter.
-
Hole Sizing: Precise hole sizing is crucial for optimal performance. The hole should be large enough to
